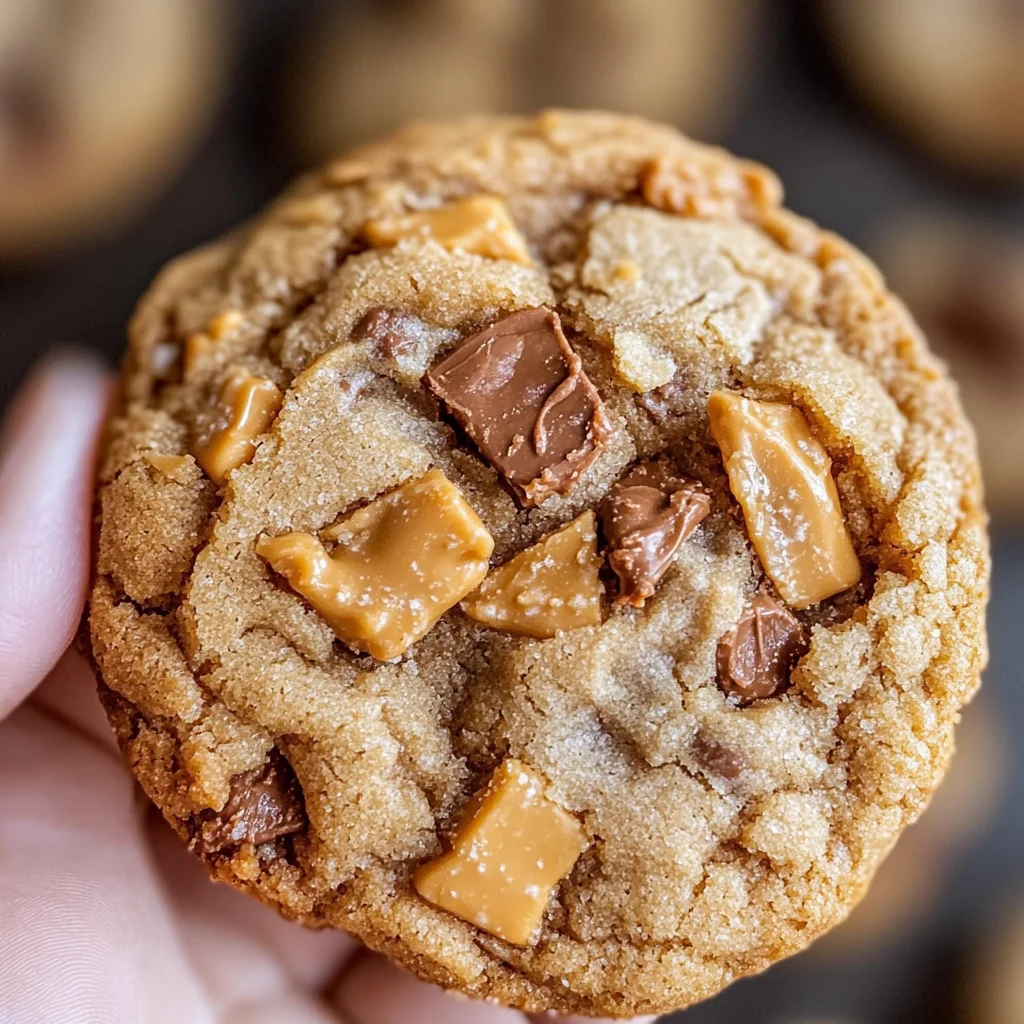
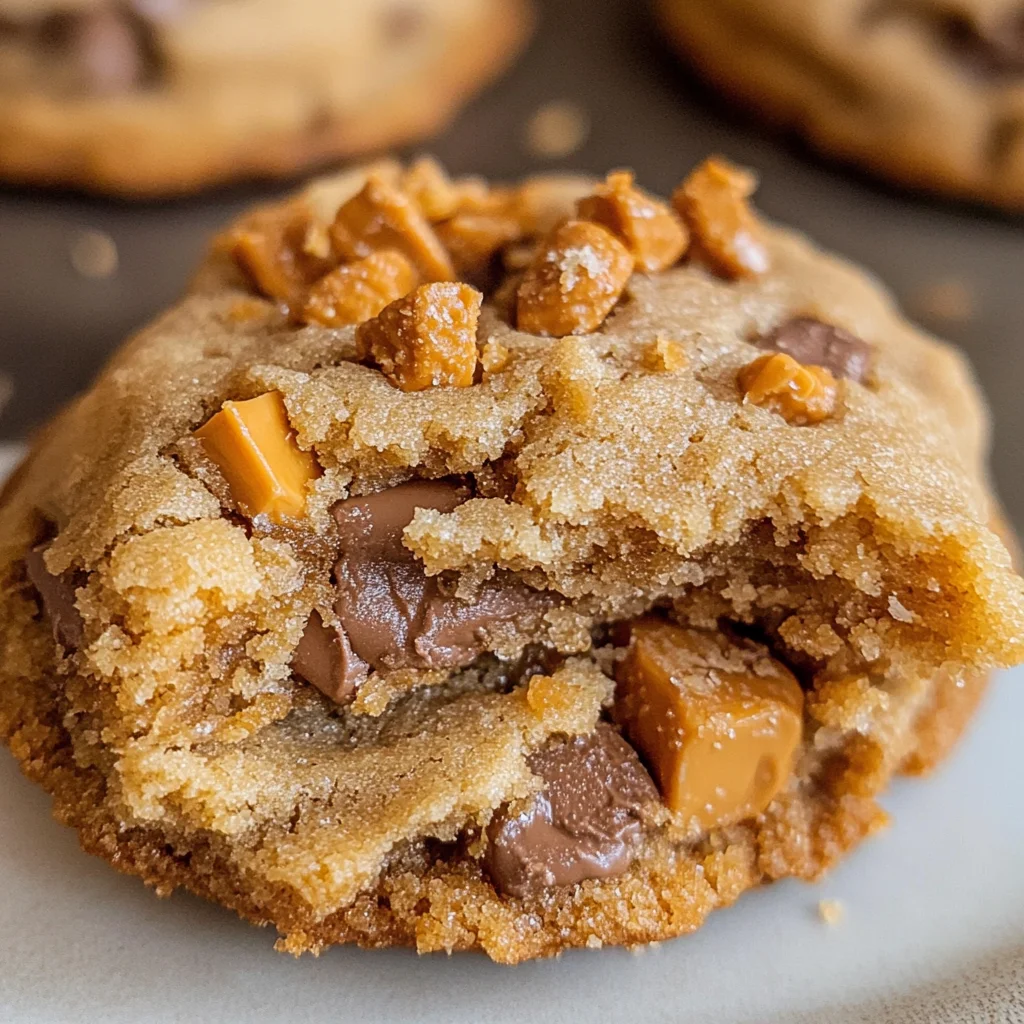
Peanut Butter Butterfinger Cookies
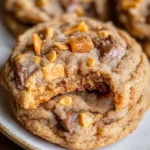
If you’re looking for a cookie that will make your taste buds dance, then I have just the recipe for you! These Peanut Butter Butterfinger Cookies are an absolute game changer. Imagine biting into a soft, thick peanut butter cookie that’s bursting with crunchy bits of Butterfinger candy. It’s like peanut brittle and cookies had a delicious love child! Whether you’re whipping these up on a busy weeknight or bringing them to a family gathering, they’re sure to be the star of the show.
What makes this recipe even more special is how simple it is. There’s nothing complicated here—just pure, cookie magic. Plus, they’re perfect for sharing or keeping all to yourself (no judgment here!). Get ready to fall in love with baking all over again!
Why You’ll Love This Recipe
- Easy to Make: This recipe comes together in no time! Perfect for those last-minute cravings.
- Family Favorite: Kids and adults alike will adore these cookies; who can resist that peanut butter and chocolate combo?
- Make-Ahead Friendly: The dough can chill in the fridge or even be frozen for later baking. Fresh cookies whenever you want!
- Delicious Texture: Enjoy the soft, chewy cookie paired with crunchy Butterfinger bits—every bite is heavenly!
Ingredients You’ll Need
You won’t need anything fancy for these Peanut Butter Butterfinger Cookies—just some simple, wholesome ingredients that you probably already have in your pantry! Here’s what you’ll need:
- 3/4 cup butter (softened, 1 and 1/2 sticks)
- 1/2 cup granulated sugar
- 1/2 cup brown sugar (packed)
- 1 cup peanut butter (don’t use natural pb)
- 1 large egg
- 1 and 1/2 teaspoons vanilla
- 1 and 1/2 cups all-purpose flour (spooned and leveled)
- 1/2 teaspoon baking soda
- 1/2 teaspoon baking powder
- 1/4 teaspoon kosher salt
- 16 ounces Butterfinger (chopped)
Variations
One of the best things about this recipe is its flexibility! Feel free to get creative with these fun variations:
- Add Chocolate Chips: If you can’t get enough chocolate, throw in some semi-sweet chocolate chips for an extra sweet touch.
- Try Different Candies: Swap out the Butterfinger for crushed Reese’s Pieces or other favorite candies for a unique twist.
- Make Them Nut-Free: Use sun butter instead of peanut butter if you’re catering to nut allergies.
- Go Gluten-Free: Substitute all-purpose flour with a gluten-free blend to make these cookies suitable for everyone.
How to Make Peanut Butter Butterfinger Cookies
Step 1: Cream the Butters
In a large bowl or stand mixer, beat the softened butter until it becomes smooth and creamy. This step is crucial because it helps incorporate air into the dough, making your cookies light and fluffy!
Step 2: Add Sugars
Next, add both granulated and brown sugars to the bowl. Beat them together until fluffy—this usually takes about two minutes. Scraping down the sides ensures everything combines well without any lumps.
Step 3: Mix in Peanut Butter
Now it’s time to add that delicious peanut butter! I recommend using Jif because it has the right consistency. This step will give your cookies their signature flavor.
Step 4: Incorporate Egg and Vanilla
Add one large egg and one and a half teaspoons of vanilla extract to your mixture. Beat until everything is nice and combined again, scraping down as needed.
Step 5: Combine Dry Ingredients
Now we will add our dry ingredients. Spoon in one and a half cups of all-purpose flour first. Then sprinkle on the baking soda, baking powder, and kosher salt right on top of the flour before mixing gently.
Step 6: Bring It All Together
Turn on your mixer at low speed to bring everything together. Be careful not to over-mix; stopping when some flour is still visible helps keep your cookies tender!
Step 7: Add Butterfinger Bits
It’s time for the star ingredient! Gently fold in those chopped Butterfingers until just incorporated. This will give each cookie its delightful crunch.
Step 8: Chill the Dough
Cover your dough and let it chill in the fridge for at least 15 minutes (or up to 24 hours if you’re feeling patient!). Chilling helps prevent spreading while baking.
Step 9: Preheat & Prepare Baking Sheets
Preheat your oven to 350°F (175°C). Line two baking sheets with parchment paper or silicone mats so your cookies won’t stick!
Step 10: Shape Cookie Balls
Using a cookie scoop or just your hands, shape the dough into balls about two inches wide. The more generous you are here, the thicker your cookies will be!
Step 11: Arrange on Baking Sheet
Place your cookie balls at least one inch apart on each sheet. Remember they’ll spread out while baking!
Step 12: Bake Time!
Bake those beauties in your preheated oven for about ten minutes. Keep an eye on them—when they’re set around the edges but still slightly shiny in the middle, they’re done!
Step 13: Flatten if Needed
If they haven’t spread much after baking, gently press down with a spatula right after taking them out of the oven.
Step 14: Cool Down
Allow them to cool on the pan for five minutes before transferring them to a wire rack where they can cool completely.
Step 15: Enjoy!
While many love warm cookies, I recommend letting these sit until they’re close to room temperature—that’s when they reach peak deliciousness!
Enjoy making these Peanut Butter Butterfinger Cookies—they’re bound to become a cherished favorite!
Pro Tips for Making Peanut Butter Butterfinger Cookies
Baking these cookies is a delightful experience, and with a few handy tips, you can elevate them from great to absolutely phenomenal!
-
Use room temperature ingredients: Ensuring your butter and egg are at room temperature helps create a smoother batter, leading to a fluffier cookie texture.
-
Don’t skip the chilling step: Chilling the dough allows the flavors to meld and prevents the cookies from spreading too much while baking, resulting in thick, chewy cookies that are perfectly soft in the middle.
-
Be careful not to overmix: Once you add the flour, mix just until combined. Overmixing can lead to tough cookies instead of the tender texture we all love.
-
Experiment with mix-ins: Feel free to play with different types of chocolate or other candies. You can create unique variations of these cookies that suit your taste!
-
Check for doneness visually: Look for set edges and a slightly puffy center. The cookies may seem underbaked but will firm up as they cool on the baking sheet.
How to Serve Peanut Butter Butterfinger Cookies
These cookies are perfect for any occasion—whether it’s a casual family gathering or a festive celebration! Here are some ideas on how to present them beautifully.
Garnishes
- Drizzle of chocolate: A light drizzle of melted chocolate over cooled cookies adds an elegant touch and enhances their visual appeal.
- Chopped nuts: Sprinkle some chopped peanuts on top for an extra crunch and a beautiful finish that complements the peanut butter flavor.
Side Dishes
- Milk: A classic pairing! Serve these cookies alongside a glass of cold milk for a nostalgic treat that everyone loves.
- Ice cream: Try serving them warm with a scoop of vanilla or chocolate ice cream for an indulgent dessert experience.
- Coffee or tea: Pair these cookies with a hot cup of coffee or herbal tea for an afternoon pick-me-up that balances the sweetness.
- Fruit platter: A fresh fruit platter can offer a refreshing contrast to the rich flavors of these cookies. Think sliced apples or berries!
With these pro tips and serving ideas, your Peanut Butter Butterfinger Cookies will surely impress everyone who gets to taste them. Happy baking!
Make Ahead and Storage
These Peanut Butter Butterfinger Cookies are perfect for meal prep! You can easily make the dough ahead of time or store the baked cookies so you can enjoy them later.
Storing Leftovers
- Store leftover cookies in a tightly sealed container at room temperature for up to 3 days.
- If you want to keep them longer, consider freezing.
Freezing
- To freeze cookie dough, shape it into balls and place them in a ziplock bag. They can be frozen for up to 3 months.
- For baked cookies, store them in a sealed container for up to 4 weeks.
Reheating
- Bake frozen cookie dough directly on a sheet pan for an additional minute or two until they’re just right.
- Allow baked cookies to thaw at room temperature before enjoying.
FAQs
Have a few questions about making these delicious treats? You’re in the right place!
Can I use natural peanut butter for Peanut Butter Butterfinger Cookies?
It’s best to avoid natural peanut butter in this recipe. Stick with a regular creamy peanut butter like Jif for optimal results.
How long do Peanut Butter Butterfinger Cookies last?
These cookies can be stored at room temperature for up to 3 days. For longer storage, freeze them!
Can I make the dough ahead of time?
Absolutely! You can chill the dough in the refrigerator for up to 24 hours or freeze it for later use.
What if I can’t find Butterfinger Bits?
You can chop regular Butterfinger bars into small pieces as an alternative. Aim for a similar size to achieve that perfect crunch!
Final Thoughts
I hope you find as much joy in baking and indulging in these Peanut Butter Butterfinger Cookies as I do! They truly bring together the delightful flavors of peanut butter and candy in every bite. Don’t hesitate to whip up a batch; your taste buds will thank you! Happy baking!
Peanut Butter Butterfinger Cookies
If you’re searching for a cookie that will elevate your dessert game, these Peanut Butter Butterfinger Cookies are an absolute must-try! These soft, chewy cookies are infused with rich peanut butter and loaded with crunchy pieces of Butterfinger candy, creating a delightful treat that pleases both kids and adults alike.
- Prep Time: 15 minutes
- Cook Time: 10 minutes
- Total Time: 25 minutes
- Yield: Approximately 24 servings 1x
- Category: Dessert
- Method: Baking
- Cuisine: American
Ingredients
- 3/4 cup softened butter
- 1/2 cup granulated sugar
- 1/2 cup packed brown sugar
- 1 cup peanut butter
- 1 large egg
- 1 and 1/2 teaspoons vanilla extract
- 1 and 1/2 cups all-purpose flour
- 1/2 teaspoon baking soda
- 1/2 teaspoon baking powder
- 1/4 teaspoon kosher salt
- 16 ounces chopped Butterfinger
Instructions
- Cream the softened butter in a large bowl until smooth.
- Add the granulated and brown sugars; beat until fluffy.
- Mix in the peanut butter, followed by the egg and vanilla extract until well combined.
- In a separate bowl, combine the flour, baking soda, baking powder, and salt.
- Gradually add the dry ingredients to the wet mixture, mixing gently until just combined.
- Fold in the chopped Butterfinger pieces.
- Chill the dough for at least 15 minutes in the fridge.
- Preheat your oven to 350°F (175°C) and prepare baking sheets with parchment paper.
- Shape dough into balls about two inches wide and place on prepared sheets.
- Bake for approximately ten minutes or until set around the edges but still slightly shiny in the center.
- Allow cookies to cool on the pan for five minutes before transferring them to a wire rack.
Nutrition
- Serving Size: 1 cookie (30g)
- Calories: 150
- Sugar: 8g
- Sodium: 80mg
- Fat: 7g
- Saturated Fat: 4g
- Unsaturated Fat: 3g
- Trans Fat: 0g
- Carbohydrates: 18g
- Fiber: 1g
- Protein: 3g
- Cholesterol: 20mg