Chocolate Cheesecake Cookies
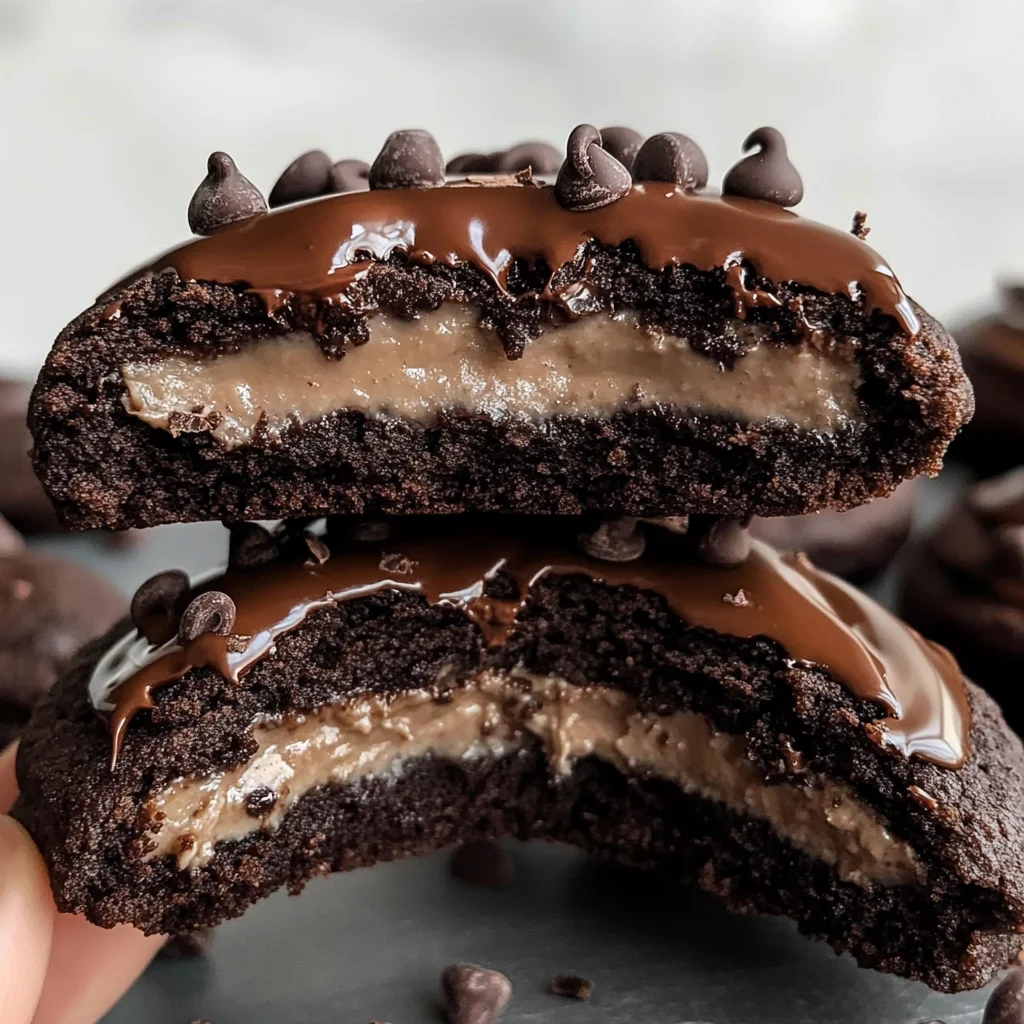
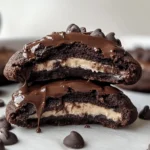
If you’re looking for a dessert that will make your taste buds dance, then these Chocolate Cheesecake Cookies are just what you need! Imagine sinking your teeth into a soft, chewy cookie filled with rich chocolate cheesecake goodness, all topped off with a silky ganache. It’s pure bliss in every bite! These cookies are perfect for any occasion—whether you’re hosting a family gathering, having a cozy movie night, or just treating yourself after a long day. Trust me, once you try them, they’ll become a go-to favorite!
What makes these cookies even more special is that they cater to various dietary needs. They’re gluten-free, egg-free, nut-free, and can easily be made vegan! So everyone can enjoy this delightful treat without worry.
Why You’ll Love This Recipe
- Easy Preparation: No mixer needed! Just grab some bowls and a spatula for easy clean-up.
- Decadent Flavor: With triple chocolate goodness packed inside and out, these cookies are a chocolate lover’s dream come true.
- Family-Friendly: Kids and adults alike will love the fun surprise of the cheesecake filling!
- Make Ahead Convenience: Prepare the dough in advance and bake fresh cookies whenever the craving strikes.
- Versatile Treat: Perfect for parties, holidays, or just because you deserve something sweet!
Ingredients You’ll Need
Making these Chocolate Cheesecake Cookies is simple with just a few wholesome ingredients. You probably have many of these in your pantry already! Here’s what you’ll need:
For the Cheesecake Filling
- 8 ounces cream cheese (room temperature)
- 1/2 cup confectioners’ sugar
- 2 tablespoons cocoa powder
For the Cookie Dough
- 1 1/4 cups multipurpose gluten free flour (with xanthan gum is ideal)
- 1/2 cup cocoa powder (I use ¼ cup Natural Unsweetened and ¼ cup Dark)
- 1 teaspoon baking soda
- 1/2 teaspoon kosher salt
- 2 rounded tablespoons cornstarch mixed with 3 tablespoons water
- 1/2 cup unsalted butter (or vegan baking stick, melted and cooled)
- 1 1/4 cups light brown sugar (packed)
- 1/4 cup plus 2 tablespoons milk
- 1 teaspoon pure vanilla extract
For Topping
- 3 tablespoons unsalted butter (or vegan baking stick)
- 6 tablespoons semi-sweet chocolate chips
- 2 tablespoons mini semi-sweet chocolate chips
Variations
This recipe is wonderfully flexible, allowing you to customize it to your liking. Here are some fun variation ideas:
- Add Some Spice: Sprinkle in a dash of cinnamon or espresso powder to enhance the flavor profile.
- Try Different Fillings: Swap out the cheesecake filling for peanut butter or even fruit preserves for a fun twist!
- Make It Nutty: If you’re not nut-free, add some crushed nuts on top of the ganache for extra crunch.
- Go Mini: Use a smaller cookie scoop to make bite-sized versions that are perfect for sharing or snacking!
How to Make Chocolate Cheesecake Cookies
Step 1: Prepare the Cheesecake Filling
In a medium bowl, grab your spatula and mix together the cream cheese, confectioners’ sugar, and cocoa powder until everything is combined. This filling is what makes these cookies so special—it’s creamy and rich!
Step 2: Freeze the Filling
Use two teaspoons to form ten dollops of this filling and place them on a small parchment-lined dish. Pop them in the freezer while preparing the cookie dough. Freezing helps keep the filling intact when baked inside the cookie.
Step 3: Melt Your Butter
In a heat-safe bowl, melt your unsalted butter or vegan baking stick. Cover it with a paper towel while microwaving it in short bursts until just melted—this prevents splatters! Let it cool slightly before using.
Step 4: Mix Dry Ingredients
In another medium bowl, whisk together the gluten-free flour, cocoa powder, baking soda, and salt. This step ensures even distribution of dry ingredients throughout your dough.
Step 5: Create Cornstarch Mixture
In a small bowl, mix cornstarch with water until it becomes thin and watery. This mixture acts as an egg substitute that helps bind everything together without eggs!
Step 6: Combine Wet Ingredients
Add light brown sugar, cornstarch mixture, and vanilla extract into your cooled melted butter. Whisk until fully combined; don’t worry if it looks chunky—it will smooth out later.
Step 7: Combine Wet & Dry Mixtures
Start by whisking half of your flour mixture into the wet ingredients. Then add milk and combine before gently folding in the remaining flour mixture with a spatula. Be careful not to over-mix; we want those cookies soft!
Step 8: Chill Your Dough
The dough will be sticky! Transfer it to a freezer-safe bowl, cover it with plastic wrap, and let it chill in the freezer for about 30 minutes. Chilling helps manage stickiness when forming cookies.
Step 9: Preheat Oven & Prepare Baking Sheet
While waiting on your dough to chill, preheat your oven to 325°F (163°C). Line your baking sheet with parchment paper—this keeps cookies from sticking without greasing.
Step 10: Scoop Out Dough Balls
After chilling time is up, use a large cookie scoop (about two ounces) to make ten scoops of dough. If it’s sticking too much to your scoop, rinse it under warm water to help release each ball easily.
Step 11: Stuff with Filling
Press your thumb into each dough ball to create an indent and place one frozen cheesecake dollop inside—then fold the dough over to seal it back up. This ensures each cookie has that delicious filling inside!
Step 12: Bake Cookies
Arrange dough balls about three to four inches apart on your prepared baking sheet. Bake at 325°F for about 16 minutes. I like to bake them in batches so I can keep some dough chilled while others bake.
Step 13: Reshape & Cool
Once they’re out of the oven, reshape any misshapen cookies immediately using a spatula into nice circles! Let them cool on the baking sheet for five minutes before moving them onto a cooling rack.
Step 14: Frost Cookies
Once completely cooled down—grab an icing spatula or butter knife—and frost each cookie with any remaining cheesecake mixture without going all the way to edges; leave some cookie visible around edges.
Step 15: Prepare Ganache Topping
In another heat-safe bowl combine chocolate chips with unsalted butter (or vegan stick). Microwave them together in short bursts until fully melted; stir until smooth.
Step 16: Top Off Cookies
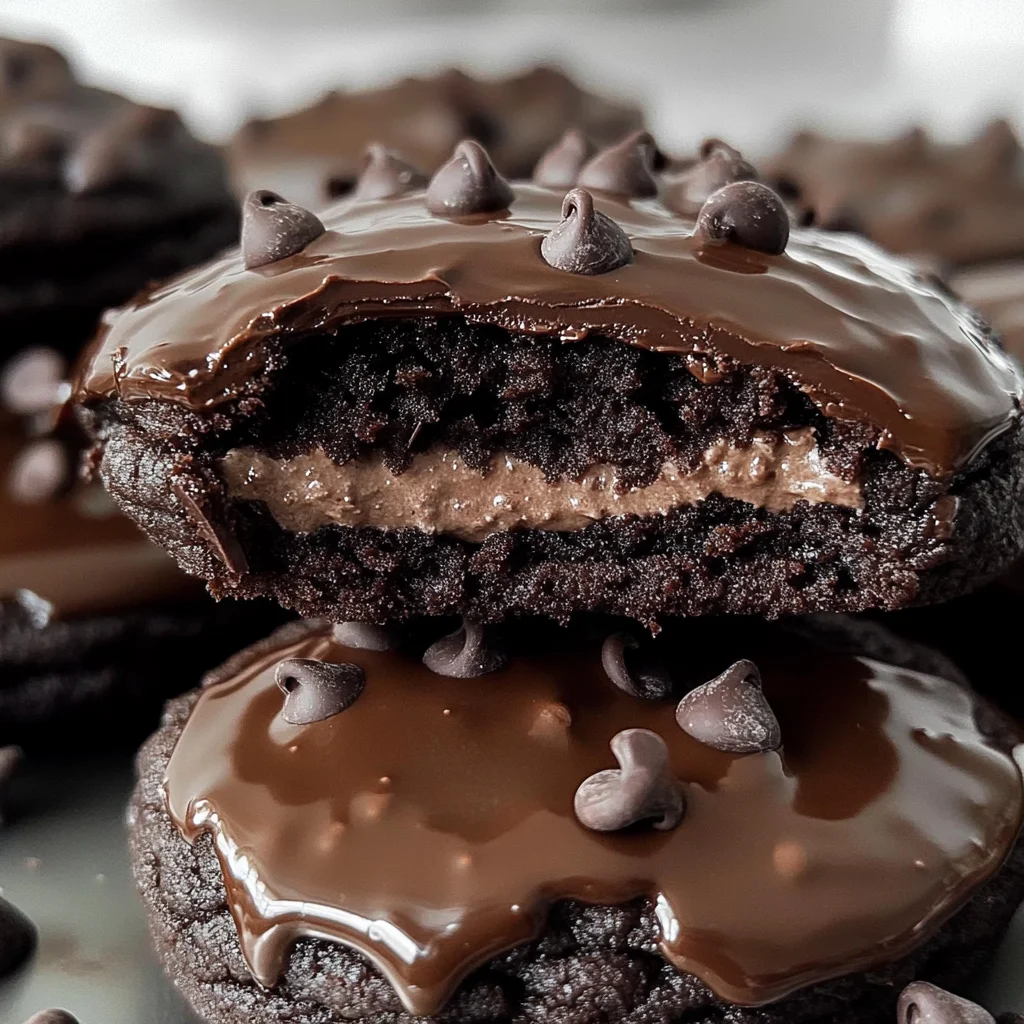
Remove frosted cookies from fridge and spoon one tablespoon of ganache on each one while ensuring frosting remains visible underneath. Sprinkle mini chocolate chips right away into wet ganache for extra flair!
And there you have it! A delicious batch of Chocolate Cheesecake Cookies ready to be devoured! Enjoy each bite knowing they’re made with love—and maybe save one or two for later!
Pro Tips for Making Chocolate Cheesecake Cookies
Baking is all about having fun and experimenting, so here are some tips to ensure your Chocolate Cheesecake Cookies turn out perfectly every time!
-
Use room temperature ingredients: Allow the cream cheese and butter to come to room temperature before mixing. This helps them blend seamlessly into the dough, resulting in a smoother texture.
-
Don’t skip the chilling step: Chilling the dough not only makes it easier to scoop but also helps the cookies maintain their shape while baking. This results in beautifully thick cookies with a chewy center!
-
Monitor baking time closely: Every oven is different, so keep an eye on your cookies as they bake. They should look set but still soft in the center when you take them out; they’ll continue to firm up as they cool.
-
Experiment with fillings: Feel free to customize the cheesecake filling by adding a splash of your favorite flavor extract or even folding in some mini chocolate chips. This adds a fun twist to each bite!
-
Store properly for freshness: To keep your cookies fresh, store them in an airtight container at room temperature for up to 4 days. You can also freeze unbaked dough balls and bake them straight from the freezer for a quick treat later!
How to Serve Chocolate Cheesecake Cookies
These Chocolate Cheesecake Cookies make a delightful treat on their own, but with a little creativity, you can elevate their presentation and flavor even further!
Garnishes
- Chocolate shavings: A sprinkle of chocolate shavings on top adds an elegant touch and enhances the chocolatey experience.
- Fresh berries: A few fresh raspberries or strawberries alongside the cookies can provide a lovely contrast in flavor and color.
Side Dishes
- Vanilla coconut ice cream: The creamy sweetness of vanilla coconut ice cream pairs wonderfully with the rich chocolate flavors of the cookies, providing a refreshing balance.
- Whipped coconut cream: Light and fluffy, whipped coconut cream offers a dairy-free alternative that complements the richness of the cookies without overpowering them.
- Fruit salad: A vibrant fruit salad adds freshness and acidity, making it a perfect counterpoint to the indulgent cookies.
- Coffee or herbal tea: A warm cup of coffee enhances the chocolate experience, while herbal tea provides a calming counterpart that balances out the sweetness.
With these serving suggestions and pro tips, you’re well-equipped to impress friends and family with your deliciously decadent Chocolate Cheesecake Cookies! Happy baking!
Make Ahead and Storage
These Chocolate Cheesecake Cookies are perfect for meal prep! You can easily make them in advance and store them for a delicious treat whenever the craving strikes. Here’s how to keep these cookies fresh:
Storing Leftovers
- Store cookies in an airtight container at room temperature for up to 3 days.
- For longer freshness, keep them in the refrigerator, where they will last up to a week.
Freezing
- Freeze unbaked cookie dough balls by placing them on a baking sheet until firm, then transfer to a freezer-safe bag.
- Baked cookies can also be frozen; just ensure they’re completely cooled before wrapping them tightly and storing them in a freezer-safe container for up to 3 months.
Reheating
- To enjoy your frozen cookie dough, bake straight from the freezer but add an extra minute or two to the baking time.
- For baked cookies, gently warm them in the microwave for about 10-15 seconds or place them in a preheated oven at 300°F until warmed through.
FAQs
Got questions? I’ve got answers! Here are some common inquiries about these delightful Chocolate Cheesecake Cookies.
Can I make Chocolate Cheesecake Cookies ahead of time?
Absolutely! You can prepare the dough or even bake the cookies ahead of time and store or freeze them for later enjoyment. Just follow the storage tips above!
What makes these Chocolate Cheesecake Cookies so special?
These cookies combine rich chocolatey flavors with creamy cheesecake filling, making each bite a decadent delight. Plus, they are gluten-free, egg-free, nut-free, and adaptable for vegan diets!
How do I prevent my Chocolate Cheesecake Cookies from spreading too much?
Make sure your dough is chilled before baking. This helps maintain the shape and prevents excessive spreading while they bake.
Can I use alternatives to cream cheese in these cookies?
Yes! For a dairy-free option, use vegan cream cheese instead. It works wonderfully without compromising taste!
Final Thoughts
I hope you find joy in creating these delightful Chocolate Cheesecake Cookies! They are not only indulgent but also versatile enough for various dietary needs. Whether you’re treating yourself or sharing with friends, these cookies are sure to impress. Enjoy every chocolatey bite, and happy baking!
Chocolate Cheesecake Cookies
Indulge your sweet tooth with these irresistible Chocolate Cheesecake Cookies! Combining the rich, velvety taste of chocolate cheesecake with a soft and chewy cookie exterior, these treats are perfect for any occasion—from cozy nights in to festive gatherings. With their gluten-free, egg-free, and nut-free ingredients, everyone can enjoy these delightful cookies without worry. Topped with a silky chocolate ganache and mini chocolate chips, they’re not just delicious but also a feast for the eyes. Once you try these decadent cookies, they will quickly become your new favorite dessert!
- Prep Time: 20 minutes
- Cook Time: 16 minutes
- Total Time: 36 minutes
- Yield: Approximately 10 servings 1x
- Category: Dessert
- Method: Baking
- Cuisine: American
Ingredients
- 8 ounces cream cheese (room temperature)
- 1/2 cup confectioners' sugar
- 2 tablespoons cocoa powder
- 1 1/4 cups multipurpose gluten free flour (with xanthan gum is ideal)
- 1/2 cup cocoa powder (1/4 cup Natural Unsweetened and 1/4 cup Dark)
- 1 teaspoon baking soda
- 1/2 teaspoon kosher salt
- 2 rounded tablespoons cornstarch mixed with 3 tablespoons water
- 1/2 cup unsalted butter (or vegan baking stick, melted and cooled)
- 1 1/4 cups light brown sugar (packed)
- 1/4 cup plus 2 tablespoons milk
- 1 teaspoon pure vanilla extract
- 3 tablespoons unsalted butter (or vegan baking stick)
- 6 tablespoons semi-sweet chocolate chips
- 2 tablespoons mini semi-sweet chocolate chips
Instructions
- In a medium bowl, mix cream cheese, confectioners' sugar, and cocoa powder until smooth to create the cheesecake filling. Freeze dollops of this filling for later.
- Melt unsalted butter or vegan stick, then whisk together with brown sugar and milk in a large mixing bowl.
- Combine dry ingredients (gluten-free flour, cocoa powder, baking soda, salt) in another bowl; gradually mix into wet ingredients until just combined.
- Chill dough for 30 minutes before preheating the oven to 325°F (163°C).
- Scoop dough into balls, fill with frozen cheesecake filling, and bake for 16 minutes.
- Once cooled, frost with remaining cheesecake mix and top with ganache made from melted chocolate chips and butter.
Nutrition
- Serving Size: 1 cookie (40g)
- Calories: 180
- Sugar: 12g
- Sodium: 45mg
- Fat: 8g
- Saturated Fat: 5g
- Unsaturated Fat: 2g
- Trans Fat: 0g
- Carbohydrates: 25g
- Fiber: 2g
- Protein: 2g
- Cholesterol: 15mg