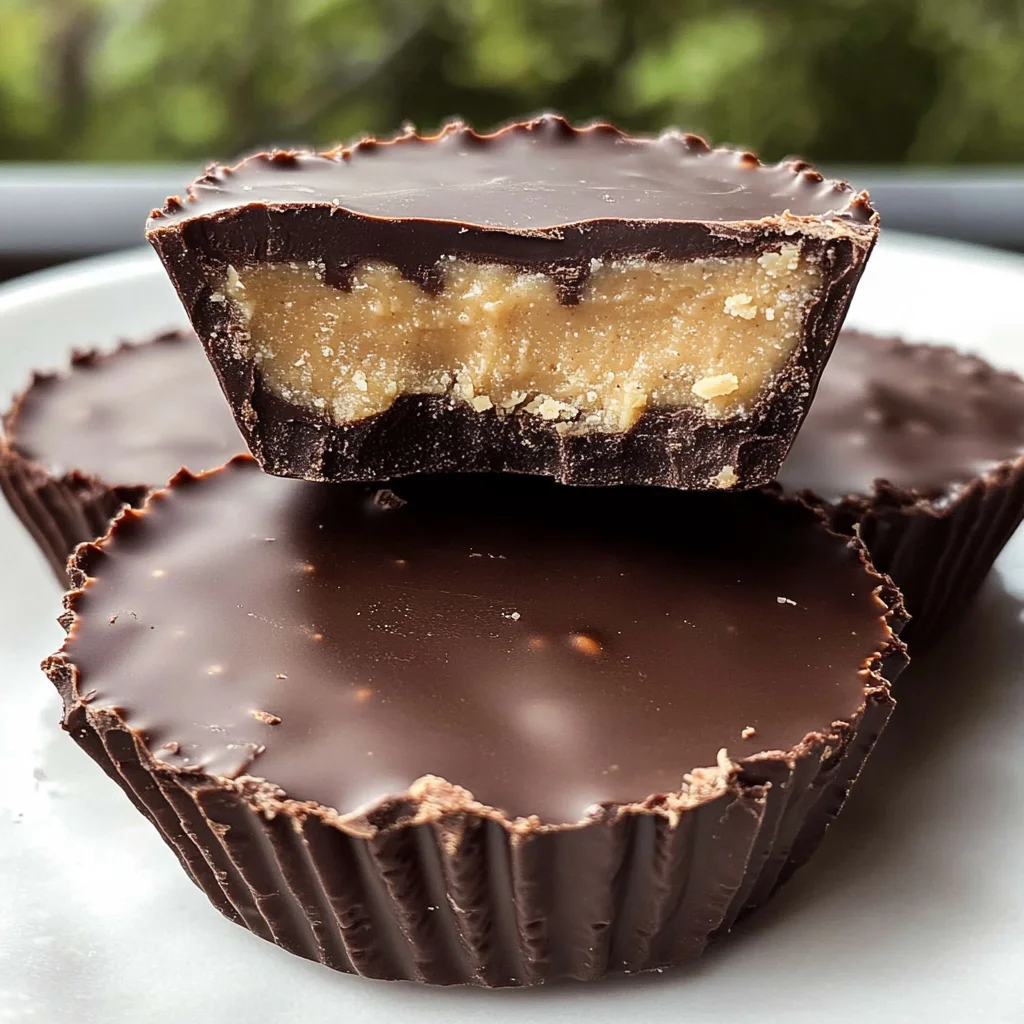
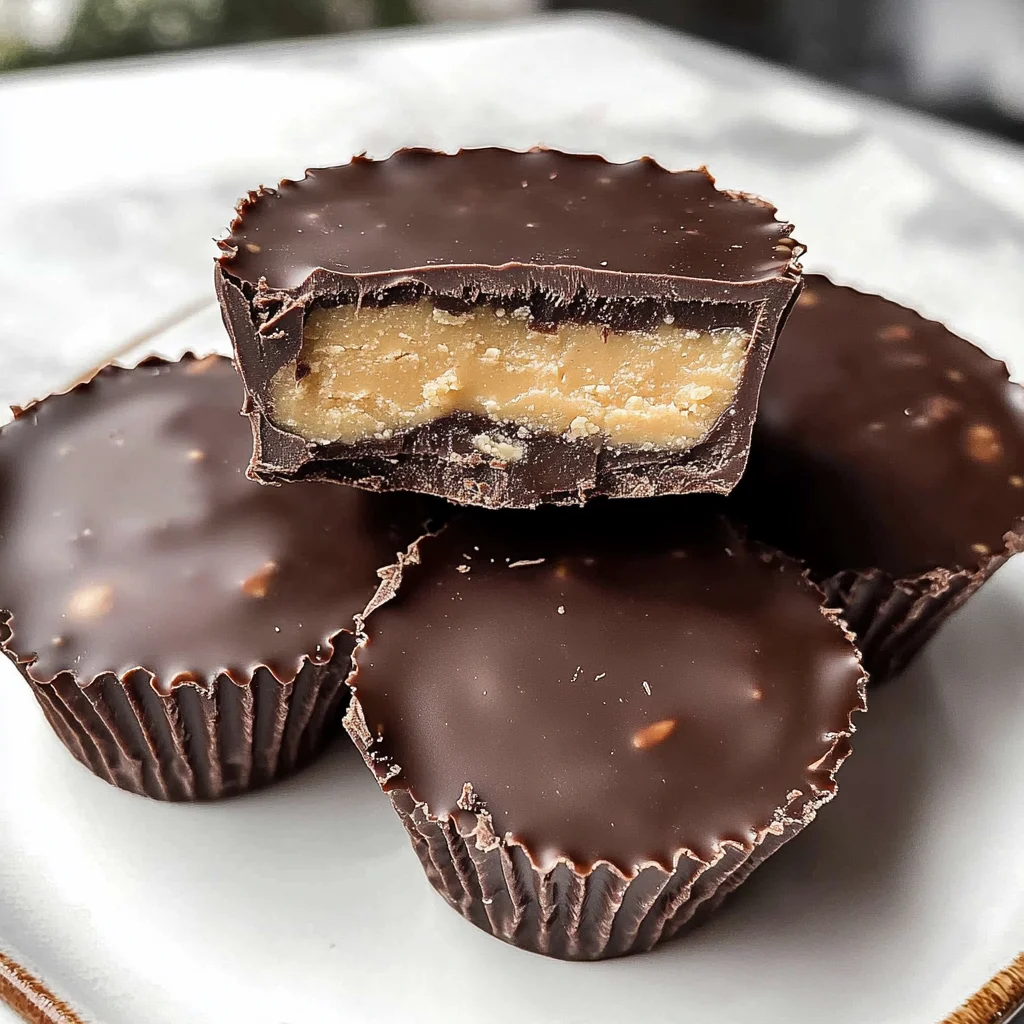
Homemade Reese’s Cups
If you’re looking for a sweet treat that brings joy to everyone, you’ve found it! Homemade Reese’s Cups are a delightful way to indulge in the creamy goodness of peanut butter wrapped in rich chocolate. It’s one of those recipes that not only satisfies your sweet tooth but also feels like a warm hug from the kitchen. Whether it’s a busy weeknight or a family gathering, these little cups of happiness are perfect for any occasion.
What I love most about this recipe is how simple and quick it is to make. You can whip them up in just about an hour, and they require minimal ingredients. Plus, they’re always a hit with kids and adults alike! Let’s dive into why these Homemade Reese’s Cups will become a favorite in your home.
Why You’ll Love This Recipe
- Super Easy to Make: With just three main ingredients, this recipe is straightforward and fun!
- Family-Friendly: Kids love helping out in the kitchen, especially when it involves chocolate and peanut butter.
- Perfect for Any Occasion: Whether it’s movie night or a birthday party, these treats fit right in!
- Make-Ahead Convenience: You can prepare them in advance and store them for later – if they last that long!
- Customizable Options: Add your favorite toppings or mix-ins for a personal touch!
Ingredients You’ll Need
Let’s talk about the magic behind these yummy Homemade Reese’s Cups! The best part? The ingredients are simple and wholesome. You probably have most of them already in your pantry!
For the Chocolate Base
- 1 cup semi-sweet chocolate chips
- 1 tablespoon coconut oil (optional)
For the Peanut Butter Filling
- ½ cup creamy peanut butter
- ¼ cup powdered sugar
- 1 teaspoon vanilla extract
Optional Toppings
- Mini chocolate chips
- Sea salt
- Crushed nuts
Variations
One of the great things about this recipe is its flexibility! You can easily customize these treats to fit your taste preferences. Here are some fun ideas:
- Swap the Chocolate: Use dark chocolate or milk chocolate chips instead for a different flavor profile.
- Add Crunch: Incorporate crushed nuts into your peanut butter filling for some texture.
- Sweeten Up: Experiment with flavored extracts, like almond or hazelnut, to change up the taste.
- Dairy-Free Option: Use dairy-free chocolate chips to make them suitable for those avoiding dairy.
How to Make Homemade Reese’s Cups
Step 1: Melt the Chocolate
Start by melting 1 cup of semi-sweet chocolate chips along with 1 tablespoon of coconut oil until smooth. The coconut oil helps give the chocolate a nice shine and makes it easier to work with. This step sets up our delicious base layer!
Step 2: Prepare the Cupcake Liners
Line a muffin tin with 12 cupcake liners. Once your chocolate mixture is ready, spoon some melted chocolate into each liner. Make sure to cover the bottom well; this will act as our tasty foundation.
Step 3: Chill the Base
Pop the muffin tin into the fridge for about 10 minutes to let that chocolate set up nicely. Chilling ensures that we get that perfect snap when we bite into our cups later on.
Step 4: Mix the Peanut Butter Filling
In a bowl, mix together ½ cup of creamy peanut butter, ¼ cup of powdered sugar, and 1 teaspoon of vanilla extract until smooth. This mix is where all that heavenly flavor comes from!
Step 5: Assemble Your Cups
Once your chocolate base has set, spoon generous amounts of peanut butter mixture onto each chilled base. Don’t be shy; you want that creamy filling to shine through!
Step 6: Top with More Chocolate
Pour any remaining melted chocolate over each cup to seal everything together. Smooth out the surface so it looks nice and even – presentation matters!
Step 7: Final Chill
Return your muffin tin to the fridge and chill for at least 30 minutes or until fully set. This waiting time builds anticipation, but trust me; it’s worth it!
Step 8: Enjoy!
Once fully set, simply remove your Homemade Reese’s Cups from their liners and enjoy! Or store them in an airtight container if you’re feeling generous enough to share.
These little delights are sure to bring smiles all around. Happy cooking!
Pro Tips for Making Homemade Reese’s Cups
Making homemade Reese’s cups is a delightful experience, and a few tips can make it even better!
-
Use high-quality chocolate – Choosing good quality semi-sweet chocolate chips will enhance the flavor of your Reese’s cups, giving them that rich, decadent taste you love.
-
Adjust coconut oil for texture – Adding coconut oil to the melted chocolate not only helps with smoothness but also makes the chocolate easier to work with when you’re spooning it into the muffin tins.
-
Chill between layers – Allowing each layer to chill before adding the next ensures clean layers and prevents the peanut butter from mixing with the chocolate too much. This keeps your treats looking beautiful!
-
Experiment with nut butter – If you want to switch things up, try using almond or cashew butter instead of peanut butter. Each one adds a unique flavor twist to your homemade cups.
-
Add toppings before chilling – If you’re feeling adventurous, sprinkle mini chocolate chips, sea salt, or crushed nuts on top of the final layer of melted chocolate before chilling. This adds an extra crunch and flavor dimension.
How to Serve Homemade Reese’s Cups
Serving homemade Reese’s cups is a fun way to impress friends and family! You can present them in various styles, whether for a special occasion or simply as an everyday treat.
Garnishes
-
Chopped nuts – A sprinkle of chopped peanuts or almonds on top can add both crunch and visual appeal.
-
Drizzle of melted chocolate – Drizzling some melted chocolate over each cup right before serving creates an elegant touch and enhances the chocolatey goodness.
Side Dishes
-
Fresh fruit salad – A light fruit salad made with seasonal fruits provides a refreshing counterbalance to the richness of the Reese’s cups.
-
Vanilla almond milk – Serving these treats with a glass of creamy vanilla almond milk adds a delightful creaminess that complements the flavors perfectly.
-
Coffee or tea – A hot cup of coffee or herbal tea pairs wonderfully with the sweetness of these cups, making for a cozy dessert experience.
-
Ice cream – For an indulgent treat, serve alongside a scoop of vanilla or dairy-free ice cream. The combination of cold ice cream and rich chocolate is simply irresistible!
Feel free to get creative with your presentations; after all, homemade treats are all about personal flair! Enjoy your delicious creations!
Make Ahead and Storage
These homemade Reese’s cups are perfect for meal prep, making them a great treat to have on hand for family gatherings or snack cravings throughout the week. They store wonderfully, so you can whip up a batch and enjoy them whenever the mood strikes!
Storing Leftovers
- Store your homemade Reese’s cups in an airtight container.
- Keep them in the refrigerator to maintain freshness.
- Enjoy within one week for the best flavor and texture.
Freezing
- Place the cups in a single layer on a baking sheet and freeze until solid.
- Once frozen, transfer them to a freezer-safe bag or container.
- They can be stored in the freezer for up to three months.
Reheating
- For best results, let frozen cups thaw in the refrigerator overnight before enjoying.
- If you prefer them slightly warmed, microwave on low power in 15-second intervals until just warm.
FAQs
Here are some common questions about making homemade Reese’s cups:
Can I make homemade Reese’s cups with dark chocolate?
Absolutely! You can substitute semi-sweet chocolate chips with dark chocolate chips for a richer flavor.
How long do homemade Reese’s cups last?
If stored properly in an airtight container, homemade Reese’s cups will last about one week in the fridge.
What are some variations for homemade Reese’s cups?
You can experiment with different nut butters like almond or cashew butter. Adding toppings like crushed nuts or mini chocolate chips is also fun!
Are homemade Reese’s cups healthier than store-bought options?
Yes, making them at home allows you to control the ingredients, making it easier to create a version that fits your dietary preferences.
Can I use natural peanut butter instead of creamy peanut butter?
Yes! Just keep in mind that natural peanut butter may have a different texture and could make the filling slightly less smooth.
Final Thoughts
I hope you find joy in making these delightful homemade Reese’s cups! They’re not just delicious; they’re also easy to prepare and perfect for sharing with loved ones. Whether you’re treating yourself or surprising friends, these treats are bound to bring smiles. Happy cooking, and enjoy every bite!
Homemade Reese’s Cups
Indulge your sweet tooth with these easy Homemade Reese’s Cups! With just three main ingredients, these delightful treats combine creamy peanut butter and rich chocolate for a satisfying dessert that everyone will love. Perfect for family gatherings, movie nights, or simply as a sweet snack, these cups are quick to make and even quicker to disappear. The best part? You can customize them with your favorite toppings or nut butters, ensuring each bite is tailored to your taste. Whether you’re an experienced baker or a kitchen novice, this no-bake recipe is sure to bring joy to your home.
- Prep Time: 15 minutes
- Cook Time: 45 minutes
- Total Time: 1 hour
- Yield: Approximately 12 servings 1x
- Category: Dessert
- Method: No-bake
- Cuisine: American
Ingredients
- 1 cup semi-sweet chocolate chips
- 1 tablespoon coconut oil (optional)
- ½ cup creamy peanut butter
- ¼ cup powdered sugar
- 1 teaspoon vanilla extract
Instructions
- Melt the semi-sweet chocolate chips and coconut oil in a bowl until smooth.
- Line a muffin tin with cupcake liners. Spoon melted chocolate into each liner, covering the bottom well.
- Chill the base in the refrigerator for about 10 minutes until set.
- In a separate bowl, mix the peanut butter, powdered sugar, and vanilla extract until smooth.
- Spoon the peanut butter mixture onto each chilled chocolate base.
- Pour remaining melted chocolate over each cup and smooth the surface.
- Chill again for at least 30 minutes until fully set.
- Remove from liners and enjoy!
Nutrition
- Serving Size: 1 cup (30g)
- Calories: 140
- Sugar: 9g
- Sodium: 10mg
- Fat: 9g
- Saturated Fat: 3g
- Unsaturated Fat: 6g
- Trans Fat: 0g
- Carbohydrates: 13g
- Fiber: 1g
- Protein: 3g
- Cholesterol: 0mg