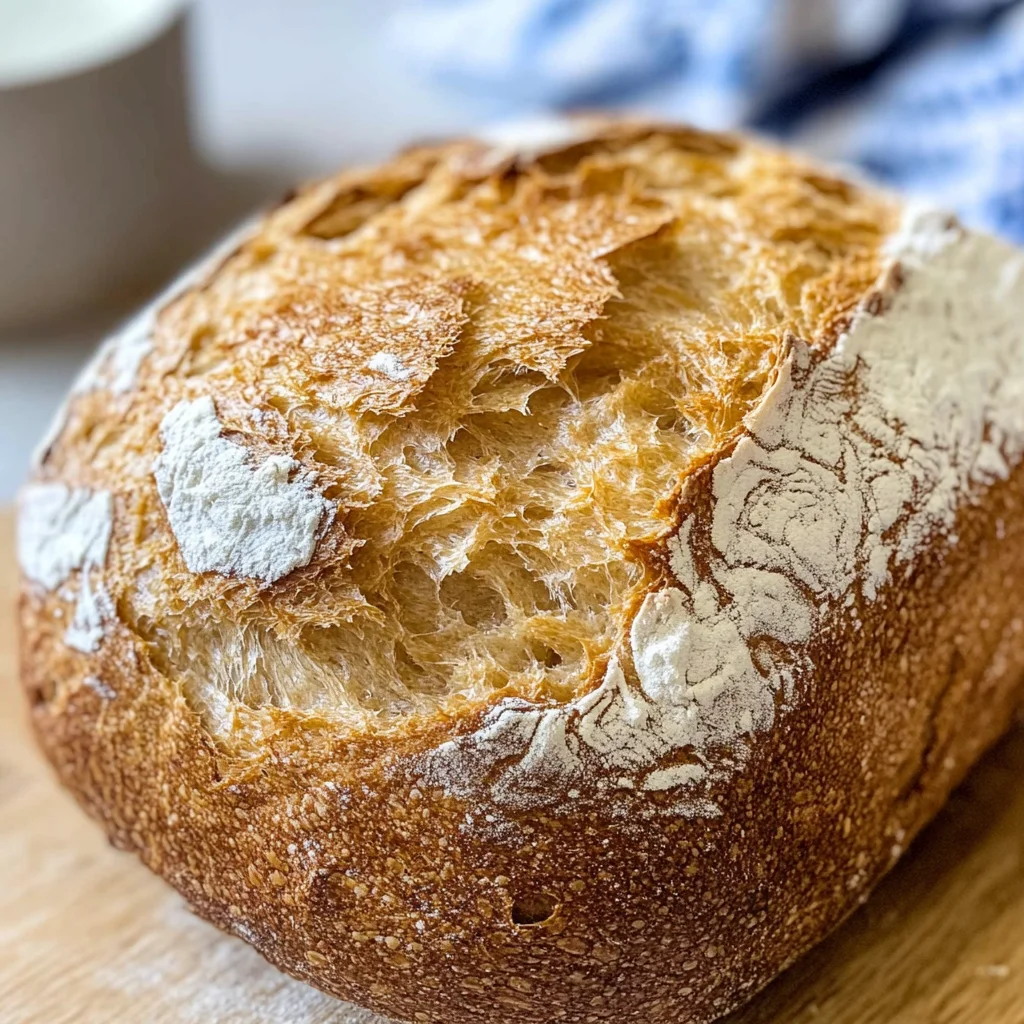
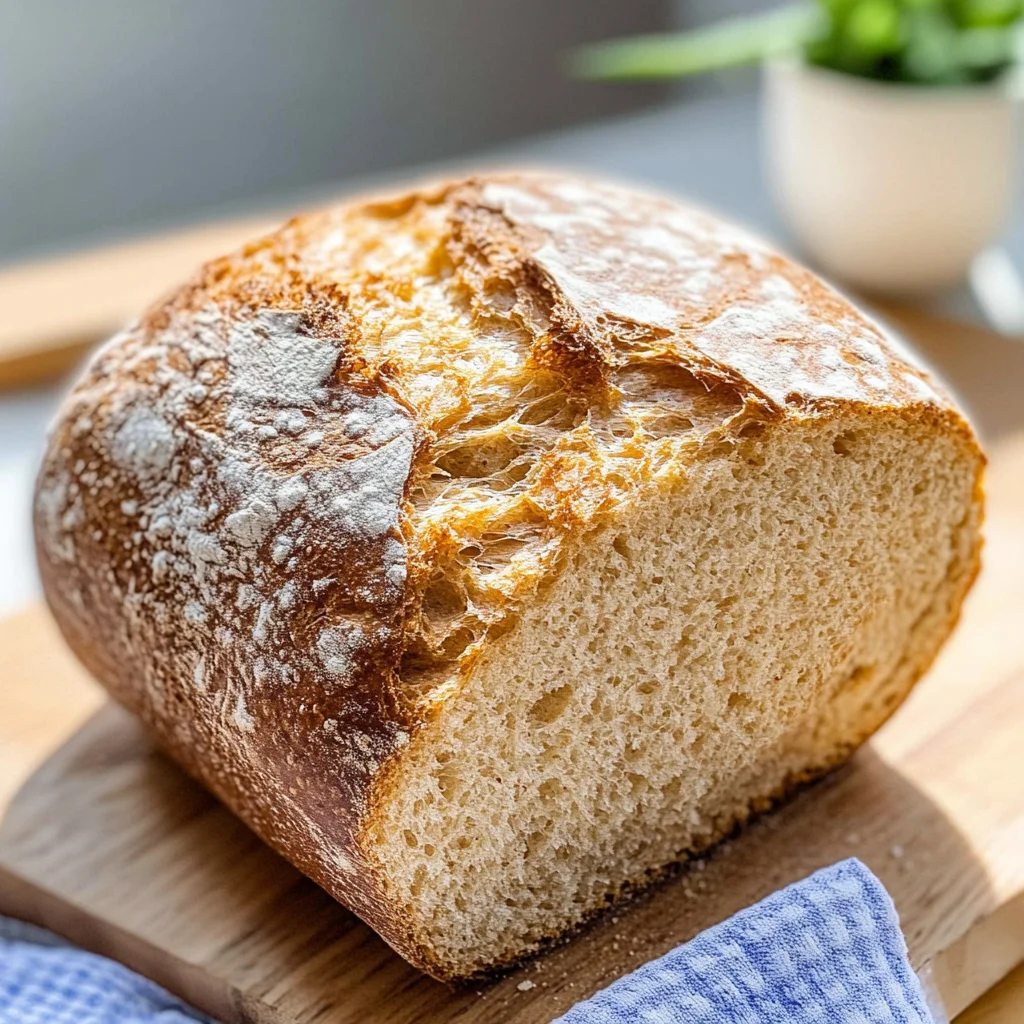
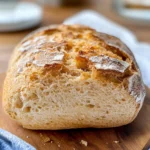
Dairy Free Bread
If you’re looking for a simple yet delightful bread recipe, you’ve come to the right place! My dairy-free bread is not only easy to whip up, but it also results in a crusty, fluffy loaf that’s perfect for any occasion. Whether you’re preparing for a busy weeknight dinner or hosting family gatherings, this bread complements every meal beautifully. Plus, it’s a wonderful treat for those who need to avoid dairy!
What makes this recipe truly special is its simplicity and the fact that it requires no yeast! You won’t need to worry about rising times or complicated techniques. Just mix your ingredients, bake, and enjoy the warm aroma wafting through your kitchen. Trust me; your family will be asking for seconds!
Why You’ll Love This Recipe
- Quick and Easy: With just a few simple steps, you can have fresh bread ready in no time!
- No Yeast Required: Say goodbye to waiting around for dough to rise. This recipe is all about instant gratification.
- Versatile: Perfect for breakfast toast, sandwich-making, or simply enjoying with a pat of dairy-free butter.
- Family-Friendly: Kids love helping out in the kitchen with this easy-to-make recipe!
- Wholesome Ingredients: Made with simple pantry staples that you likely already have on hand.
Ingredients You’ll Need
To make this delicious dairy-free bread, you only need a handful of wholesome ingredients. Each one plays a crucial role in creating that perfect texture and flavor you’ll adore.
For the Bread
- 1 cup milk of choice (I used oat milk)
- 2 tablespoons white vinegar (* See notes)
- 2 cups all-purpose flour (Use gluten-free if needed)
- 1/2 teaspoon baking soda
- 1/2 teaspoon salt
- 1 tablespoon sugar
Variations
This dairy-free bread recipe is wonderfully flexible! Feel free to customize it according to your taste preferences or dietary needs.
- Add herbs: Stir in some dried herbs like rosemary or thyme for an aromatic touch.
- Include seeds: Sprinkle in sunflower seeds or flaxseeds for added texture and nutrition.
- Make it sweet: Add a handful of raisins or dried cranberries for a hint of sweetness.
- Experiment with flours: Try using whole wheat flour or almond flour for different flavors and textures.
How to Make Dairy Free Bread
Step 1: Preheat the Oven
Start by preheating your oven to 200C/400F. This ensures that your bread will bake evenly and develop that lovely golden crust we all crave!
Step 2: Prepare the Milk Mixture
In a small bowl, combine your milk of choice with the white vinegar. Let this mixture sit for about 10 minutes until it curdles slightly. This step mimics buttermilk and adds moisture and richness to the bread!
Step 3: Mix Dry Ingredients
In a large mixing bowl, whisk together the flour, salt, sugar, and baking soda until well combined. This is where we build our flavor base!
Step 4: Combine Wet and Dry Ingredients
Gradually add your curdled milk mixture into the dry ingredients in two increments. Gently mix until it’s just combined—overmixing can lead to dense bread.
Step 5: Shape the Dough
Lightly flour your kitchen surface and transfer the dough onto it. Sprinkle some flour on top and gently knead it around 8-10 times until it forms a dome shape. Don’t worry if it feels sticky; that’s exactly how it should be! Use a sharp knife to cut an X shape into the top of the dough—this allows steam to escape as it bakes.
Step 6: Bake Your Bread
Place your shaped dough onto a lined baking tray and pop it into your preheated oven. Bake for 20-25 minutes! Keep an eye on it after 20 minutes; it’s done when it’s golden brown on top and sounds hollow when tapped on the bottom.
Step 7: Cool Down Before Slicing
Once baked, remove your beautiful loaf from the oven and let it cool completely on the tray before slicing. This step helps maintain its fluffy texture—then slice away and enjoy toasted or plain!
And there you have it—your very own homemade dairy-free bread! Perfectly fluffy, crusty, and full of flavor. Enjoy every bite!
Pro Tips for Making Dairy Free Bread
Making dairy-free bread can be a delightful experience, especially with a few handy tips to ensure your loaf turns out perfectly every time!
-
Use fresh ingredients: Fresh flour and baking soda can make a significant difference in the rise and texture of your bread. Always check the expiration dates on your baking supplies!
-
Don’t rush the curdling process: Allowing the milk and vinegar mixture to sit for at least 10 minutes is crucial. This step mimics buttermilk and helps create a light, fluffy texture in your bread.
-
Keep the dough sticky: Resist the urge to add too much flour when kneading. A slightly sticky dough results in a softer crumb and airy loaf, so embrace that stickiness!
-
Check for doneness: Since ovens vary, keep an eye on your bread as it bakes. The hollow sound when tapped is a reliable indicator that it is fully cooked and ready to be enjoyed.
-
Cool completely before slicing: Patience is key! Letting your bread cool entirely allows it to set properly, preventing it from becoming gummy when sliced.
How to Serve Dairy Free Bread
Dairy-free bread is versatile and can be enjoyed in numerous ways. Whether you’re serving it for breakfast or as part of a cozy dinner spread, here are some delightful ideas!
Garnishes
- Avocado slices: Creamy avocado adds healthy fats and pairs beautifully with toast.
- Fresh herbs: A sprinkle of chopped parsley or chives brings brightness and freshness to your bread.
Side Dishes
- Soup: A warm bowl of tomato or vegetable soup complements dairy-free bread wonderfully and makes for a comforting meal.
- Salad: Pairing with a crisp green salad dressed in lemon vinaigrette offers balance and nutrition.
- Hummus: This protein-packed dip is perfect for spreading on warm slices of bread, adding flavor and richness.
- Jam or fruit preserves: Sweet jams can elevate your breakfast experience by adding a touch of sweetness that contrasts beautifully with the crusty texture of the bread.
Enjoy experimenting with these serving ideas, and make this dairy-free bread your own!
Make Ahead and Storage
This dairy-free bread recipe is perfect for meal prep! You can easily make a batch ahead of time, ensuring you have freshly baked bread ready when you need it.
Storing Leftovers
- Allow the bread to cool completely before storing.
- Wrap the bread tightly in plastic wrap or aluminum foil.
- Store at room temperature for up to 3 days.
Freezing
- Slice the bread before freezing for easy access.
- Wrap each slice in plastic wrap and place them in an airtight freezer bag.
- Freeze for up to 3 months.
Reheating
- To reheat, simply pop a slice into the toaster until warm and crispy.
- Alternatively, heat in an oven at 180C/350F for about 10 minutes.
FAQs
If you’re curious about this dairy-free bread recipe, here are some common questions!
Can I use different types of milk in this dairy free bread?
Absolutely! This dairy-free bread works well with any plant-based milk. Options like almond milk, soy milk, or coconut milk will also yield delicious results.
How can I make dairy free bread gluten-free?
To make this dairy free bread gluten-free, simply substitute all-purpose flour with a gluten-free flour blend. Ensure that your baking powder and other ingredients are also gluten-free.
What can I serve with dairy free bread?
Enjoy this delightful bread with avocado spread, hummus, or your favorite jam. It’s also perfect as a base for sandwiches or served alongside soups!
Final Thoughts
I hope you enjoy making this delightful dairy-free bread as much as I do! It’s not only easy to whip up but also incredibly satisfying to enjoy warm and fresh from the oven. Whether you’re serving it at breakfast or as an accompaniment to dinner, I’m sure it will bring joy to your table. Happy baking!
Dairy Free Bread
Enjoy fluffy Dairy Free Bread that’s easy to make! Perfect for sandwiches or toast, try this simple recipe today for a delicious treat.
- Prep Time: 10 minutes
- Cook Time: 25 minutes
- Total Time: 35 minutes
- Yield: Approximately 12 servings 1x
- Category: Bread
- Method: Baking
- Cuisine: Vegan
Ingredients
- 1 cup milk of choice (oat milk recommended)
- 2 tablespoons white vinegar
- 2 cups all-purpose flour (gluten-free if needed)
- 1/2 teaspoon baking soda
- 1/2 teaspoon salt
- 1 tablespoon sugar
Instructions
- Preheat your oven to 200C/400F.
- In a small bowl, mix the milk with white vinegar and let it sit for 10 minutes to curdle.
- In a large bowl, whisk together the flour, salt, sugar, and baking soda.
- Gradually mix in the curdled milk until just combined—avoid overmixing.
- Transfer the dough to a floured surface and knead gently about 8-10 times until slightly sticky.
- Shape the dough into a dome, cut an 'X' on top for steam release, then place on a lined baking tray.
- Bake for 20-25 minutes until golden brown and sounds hollow when tapped.
- Cool completely before slicing.
Nutrition
- Serving Size: 1 serving
- Calories: 120
- Sugar: 2g
- Sodium: 150mg
- Fat: 1g
- Saturated Fat: 0g
- Unsaturated Fat: 1g
- Trans Fat: 0g
- Carbohydrates: 24g
- Fiber: 1g
- Protein: 3g
- Cholesterol: 0mg