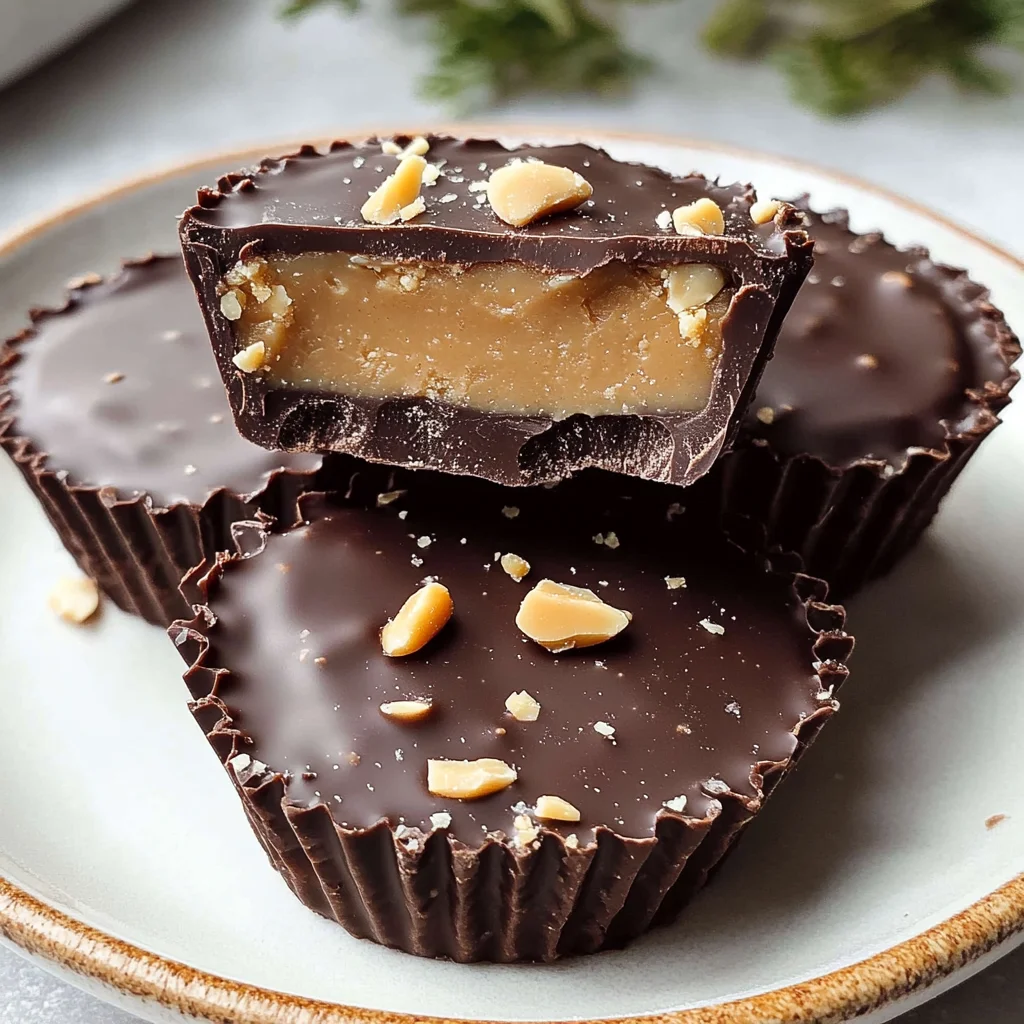
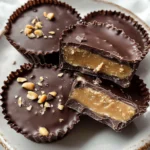
Homemade Reese’s Peanut Butter Cups
If you’re looking for a sweet treat that brings back childhood memories, these Homemade Reese’s Peanut Butter Cups are just the thing! There’s something incredibly satisfying about crafting your own version of this iconic candy in the comfort of your kitchen. Not only do they taste divine with their creamy peanut butter center and rich chocolate shell, but they are also super easy to make. Whether it’s a busy weeknight or a family gathering, this recipe is perfect for any occasion.
These delightful homemade treats are great for satisfying that sweet tooth or sharing with friends and loved ones. Plus, the best part? You can customize them to suit your taste!
Why You’ll Love This Recipe
- Quick to prepare: With just 10 minutes of prep and 5 minutes of cooking, you’ll have these delicious cups ready in no time.
- Family-friendly: Everyone loves peanut butter and chocolate! These treats are sure to be a hit with kids and adults alike.
- Make-ahead convenience: Whip up a batch ahead of time and store them in the fridge for an easy dessert whenever cravings strike.
- Customizable: Add toppings or mix-ins to make these cups truly your own!
- Satisfying flavor: The combination of creamy peanut butter and rich chocolate is simply irresistible.
Ingredients You’ll Need
Gathering the ingredients for these Homemade Reese’s Peanut Butter Cups is a breeze! You’ll find that they are simple, wholesome items you might already have on hand.
For the Peanut Butter Filling
- 1 cup creamy peanut butter
- 1/4 cup powdered sugar
- 1/2 teaspoon vanilla extract
For the Chocolate Shell
- 1 1/2 cups chocolate chips
- Cupcake liners or silicone molds
Optional Topping
- 1/4 cup chopped peanuts
Variations
One of the best things about this recipe is its flexibility! Feel free to get creative with different flavors and textures. Here are some fun ideas:
- Change the nut butter: Swap out peanut butter for almond or cashew butter for a new twist on flavor.
- Add spices: Mix in a pinch of cinnamon or sea salt into the peanut butter filling for an extra kick!
- Use dark chocolate: For a richer taste, try using dark chocolate chips instead of milk chocolate.
- Stuff them with goodies: Add mini marshmallows or dried fruit inside for delightful surprises!
How to Make Homemade Reese’s Peanut Butter Cups
Step 1: Prepare the Peanut Butter Filling
In a bowl, mix together the creamy peanut butter, powdered sugar, and vanilla extract. Stir until everything is smooth and well combined. This step is crucial because it creates that dreamy texture we all love!
Step 2: Melt the Chocolate
Melt your chocolate chips in either a microwave-safe bowl or double boiler. If using a microwave, heat in short bursts, stirring between each until fully melted. This melting process is important as it ensures your chocolate is smooth and easy to work with.
Step 3: Line Your Molds
Take your muffin tin and line it with either cupcake liners or use silicone molds. This makes removing your treats much easier later on!
Step 4: Create the Chocolate Base
Pour a small amount of melted chocolate into each liner, just enough to cover the bottom. This creates a solid base for your peanut butter layer.
Step 5: Add Peanut Butter Filling
Spoon a generous layer of your peanut butter mixture on top of the chocolate base. Don’t worry about making it perfect; just ensure it’s spread evenly.
Step 6: Top with More Chocolate
Pour more melted chocolate over the peanut butter layer until it’s completely covered. This ensures every bite has that delicious chocolatey goodness.
Step 7: Optional Toppings
If you want to add some crunch, now’s the time! Sprinkle chopped peanuts on top before the chocolate sets.
Step 8: Chill to Set
Place your tray in the refrigerator for about 30 minutes, or until the chocolate is firm. This step helps everything come together beautifully!
Step 9: Enjoy Your Treats!
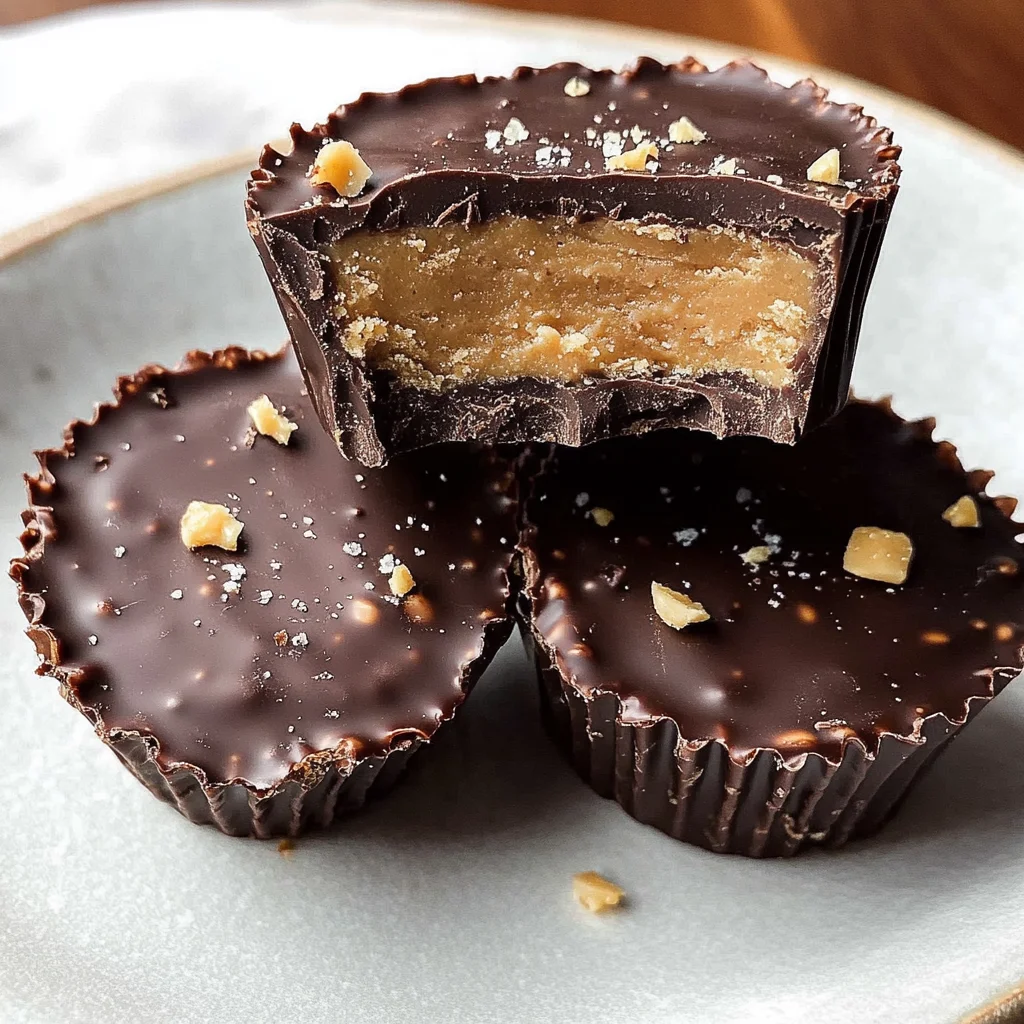
Once set, carefully remove each cup from its liner and savor your homemade Reese’s Peanut Butter Cups! They are sure to bring smiles all around.
With this easy recipe at hand, you can impress friends and family with these delightful treats anytime! Enjoy every indulgent bite!
Pro Tips for Making Homemade Reese’s Peanut Butter Cups
Making your own peanut butter cups is a delightful experience that can be made even better with these helpful tips!
-
Use Quality Ingredients: The flavor of your homemade treats will shine through if you use high-quality chocolate and creamy peanut butter. Look for brands with minimal ingredients to ensure the best taste.
-
Let Chocolate Cool Slightly: Allow the melted chocolate to cool for a couple of minutes before pouring it into your molds. This helps prevent the chocolate from melting the peanut butter layer, keeping your cups perfectly layered.
-
Experiment with Mix-Ins: Adding chopped peanuts or other nuts to the peanut butter mixture can give your cups an extra crunch and flavor. Play around with this to find your favorite combination!
-
Store Properly: To keep your homemade peanut butter cups fresh, store them in an airtight container in the refrigerator. They’ll last up to two weeks, but I bet they won’t last that long!
How to Serve Homemade Reese’s Peanut Butter Cups
Serving your homemade Reese’s Peanut Butter Cups can be just as fun as making them! Here are some ideas on how to present these delicious treats.
Garnishes
- Sea Salt Flakes: A sprinkle of sea salt on top enhances the sweetness of the chocolate and adds a gourmet touch.
- Crushed Nuts: For an added crunch and visual appeal, sprinkle crushed peanuts or almonds on top before the chocolate sets.
Side Dishes
- Fresh Fruit: Slices of strawberries or bananas add a refreshing balance to the rich flavors of the peanut butter cups and make for a delightful contrast.
- Milkshake: A classic chocolate or vanilla milkshake pairs perfectly with these sweet treats, creating a nostalgic dessert experience.
- Ice Cream: Serve alongside a scoop of vanilla or salted caramel ice cream for an indulgent treat that complements the flavors beautifully.
- Coffee: A cup of freshly brewed coffee can enhance the chocolatey richness of your peanut butter cups, making it an ideal pairing for those who enjoy desserts with their morning brew.
So there you have it! With these pro tips and serving suggestions, you’re all set to impress family and friends with your Homemade Reese’s Peanut Butter Cups. Enjoy every delicious bite!
Make Ahead and Storage
These Homemade Reese’s Peanut Butter Cups are perfect for meal prep, making it easy to indulge in a sweet treat whenever you crave something delicious. Here’s how to store them properly!
Storing Leftovers
- Store your peanut butter cups in an airtight container.
- Keep them in the refrigerator for up to one week.
- If you want to keep them longer, consider freezing.
Freezing
- Wrap each peanut butter cup individually in plastic wrap or aluminum foil.
- Place them in a freezer-safe bag or container.
- They can be frozen for up to three months; just thaw at room temperature before enjoying!
Reheating
- There’s no need to reheat these treats; they are best enjoyed chilled straight from the fridge or at room temperature.
- If you prefer them slightly warm, microwave for about 10-15 seconds on low power, but be careful not to melt the chocolate too much.
FAQs
Here are some answers to common questions about Homemade Reese’s Peanut Butter Cups!
Can I use crunchy peanut butter instead of creamy?
Absolutely! Crunchy peanut butter will give your homemade cups an extra texture that many people love.
How do I make Homemade Reese’s Peanut Butter Cups vegan?
To make these delightful treats vegan, simply replace chocolate chips with dairy-free chocolate chips and ensure your peanut butter is free from added ingredients.
Can I add other flavors to my Homemade Reese’s Peanut Butter Cups?
Yes! Feel free to experiment by adding ingredients like sea salt, cinnamon, or even a splash of maple syrup for a twist on the classic flavor.
How long do Homemade Reese’s Peanut Butter Cups last?
When stored properly in the refrigerator, they can last up to one week. If frozen, they can remain good for up to three months.
What’s the best way to remove the cups from their liners?
Allow them to sit at room temperature for a few minutes after coming out of the fridge. This will help loosen the chocolate slightly so they pop out easily without breaking.
Final Thoughts
I hope you enjoy making these Homemade Reese’s Peanut Butter Cups as much as I do! They’re not just delicious; they’re also easy to prepare and perfect for sharing with friends and family. Whether you’re treating yourself or looking for a fun gift idea, these little bites of joy are sure to impress. Happy cooking, and don’t forget to savor every sweet moment!
Homemade Reese’s Peanut Butter Cups
Indulging in homemade treats is a delightful way to bring nostalgia into your kitchen. These Homemade Peanut Butter Cups are the perfect blend of creamy peanut butter and rich chocolate, making them a favorite among kids and adults alike. Not only are they incredibly easy to whip up in just a short time, but they also offer endless customization possibilities to suit your taste. Whether you’re looking for a quick dessert for a busy weeknight or want to impress at a family gathering, these delightful cups will surely be a hit!
- Prep Time: 10 minutes
- Cook Time: 5 minutes
- Total Time: 15 minutes
- Yield: Approximately 12 servings 1x
- Category: Dessert
- Method: No Bake
- Cuisine: American
Ingredients
- 1 cup creamy peanut butter
- 1/4 cup powdered sugar
- 1/2 teaspoon vanilla extract
- 1 1/2 cups chocolate chips
- Cupcake liners or silicone molds
- Optional: 1/4 cup chopped peanuts
Instructions
- In a bowl, combine peanut butter, powdered sugar, and vanilla extract until smooth.
- Melt chocolate chips using a microwave or double boiler until fully melted.
- Line muffin tin with cupcake liners or use silicone molds.
- Pour melted chocolate into each liner to create a base layer.
- Spoon peanut butter mixture on top of the chocolate base.
- Cover with more melted chocolate until completely sealed.
- Sprinkle optional chopped peanuts on top before chilling.
- Refrigerate for 30 minutes until set, then remove from liners and enjoy!
Nutrition
- Serving Size: 1 cup (40g)
- Calories: 190
- Sugar: 10g
- Sodium: 75mg
- Fat: 12g
- Saturated Fat: 5g
- Unsaturated Fat: 7g
- Trans Fat: 0g
- Carbohydrates: 17g
- Fiber: 2g
- Protein: 4g
- Cholesterol: 0mg