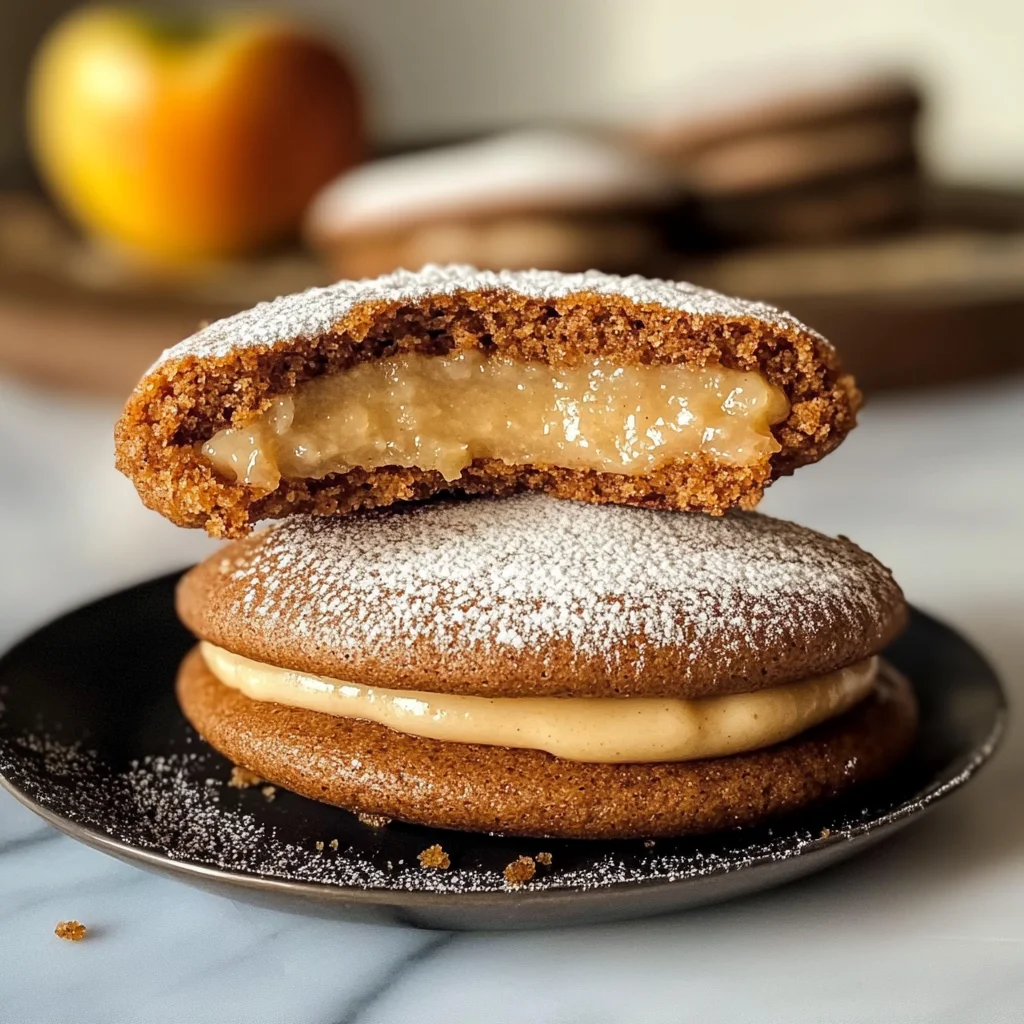
Apple Cider Whoopie Pies
If you’re looking for a cozy fall treat that will warm your heart and fill your home with the sweet scent of autumn, then you’re in the right place! These Apple Cider Whoopie Pies are not just cookies; they are little bites of joy. With flavors reminiscent of apple cider doughnuts, they bring a delightful twist to the traditional whoopie pie. Whether you’re making them for a family gathering or just as a special weekend treat, these pies are sure to become a favorite.
What makes this recipe so special is how easy it is to whip up these delicious cookies. They are perfect for baking with kids or sharing with friends. Imagine cozying up on a brisk fall evening with one of these delightful desserts in hand!
Why You’ll Love This Recipe
- Easy to Make: This recipe comes together quickly, making it perfect for busy weeknights or spontaneous gatherings.
- Family-Friendly: Kids love these sweet treats! They can help assemble the pies, making it a fun family activity.
- Delicious Flavor: The combination of apple cider, cinnamon, and spices creates a warm and inviting taste that screams fall.
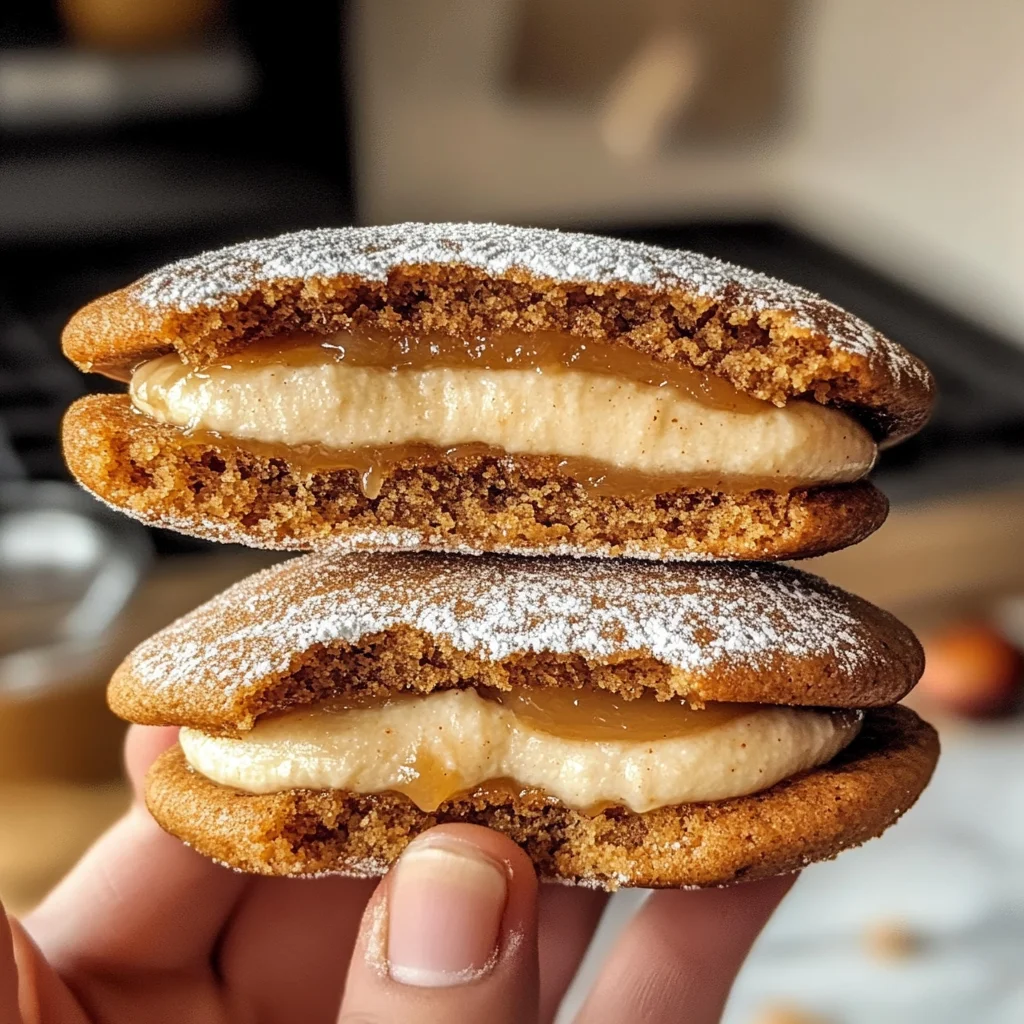
- Versatile Options: Fill them with either bourbon caramel buttercream or brown sugar cream cheese icing—so you can customize each bite!
- Make-Ahead Friendly: Bake the cookies ahead of time and fill them just before serving for an effortless dessert.
Ingredients You’ll Need
To make these Apple Cider Whoopie Pies, you’ll need some simple and wholesome ingredients that bring out the best in every bite. Here’s what you’ll need:
For the Cookies
- 2 cups apple cider (reduced to 1/4 cup)
- ½ cup unsalted butter (room temperature, divided)
- 1 ¾ cups flour
- ½ teaspoon salt
- 1 teaspoon baking powder
- ¼ teaspoon baking soda
- 1 ½ teaspoon cinnamon
- ¼ teaspoon ginger
- ½ teaspoon nutmeg
- ½ cup granulated sugar
- ¼ cup plus 2 teaspoons brown sugar (light or dark, packed)
- ¼ cup apple butter or applesauce
- 2 eggs
- ¼ teaspoon vanilla
For the Cinnamon Sugar Coating
- 3 tablespoons butter (melted)
- ¼ cup sugar
- ½ teaspoon cinnamon
For the Filling
Bourbon Caramel Buttercream
- ½ cup unsalted butter (room temperature)
- 1 ¼- 1 ½ cups powdered sugar (sifted)
- 2 tablespoons plus 2 teaspoons Bourbon Caramel Sauce
- 1 pinch salt
Brown Sugar Cream Cheese Icing
- 4 ½ ounces cream cheese (room temperature)
- 3 tablespoons butter (room temperature)
- 2 tablespoons brown sugar (light or dark)
- 2 cups powdered sugar (sifted)
- ½ teaspoon vanilla extract
- 1 pinch salt
Variations
This recipe is wonderfully flexible! Here are some fun variations you can try:
- Switch Up the Filling: Instead of bourbon caramel buttercream, use your favorite flavored cream cheese icing for a different twist.
- Add Nuts: Fold in some chopped pecans or walnuts into your cookie dough for added texture and flavor.
- Spice It Up: Experiment with different spices like cardamom or allspice to give your whoopie pies a unique flair.
- Change the Sweetener: Feel free to use coconut sugar instead of brown sugar for an alternative sweetness.
How to Make Apple Cider Whoopie Pies
Step 1: Reduce the Apple Cider
Preheat your oven to 350°F. In a medium saucepan, bring the apple cider to a boil over medium-high heat. This step is crucial because reducing the cider concentrates its flavor, giving your cookies that wonderful taste we all love. Let it simmer until it reduces down to about 1/4 cup—this should take around 30-35 minutes. Once done, set it aside to cool while you prepare everything else.
Step 2: Mix Dry Ingredients
In a medium-sized bowl, sift together the flour, baking powder, baking soda, salt, and spices. Sifting helps blend everything evenly and ensures there are no lumps—important for achieving that soft cookie texture!
Step 3: Cream Together Butter and Sugars
In a large bowl or an electric mixer bowl, beat together 6 tablespoons of room-temperature butter with both sugars at medium speed until well combined. This step adds air into the mixture which helps create light cookies. Scrape down the sides of your bowl before adding in the vanilla and eggs one at a time.
Step 4: Combine Wet and Dry Mixtures
Next, mix in your cooled apple cider followed by either apple butter or applesauce. Gradually add in your flour mixture on low speed until just combined—the goal here is not overmixing!
Step 5: Shape Your Cookies
Scoop out mounds of dough about 1 ½ tablespoons each and place them about three inches apart on your lined baking sheets. Bake for about 11-13 minutes until they spring back when touched lightly; this ensures they’re perfectly soft!
Step 6: Cool and Coat Cookies
Once baked, let them cool on the baking sheet for five minutes before transferring them onto a wire rack. Brush each cookie with melted butter while they’re still warm and sprinkle generously with cinnamon sugar. This gives them that delectable sweet crust!
Step 7: Fill Your Whoopie Pies
After cooling completely on racks, it’s time for filling! Use either bourbon caramel buttercream or brown sugar cream cheese icing—whichever you prefer! Just spread about 1 ½ tablespoons on half of your cookies and top with another half.
And there you have it! Delicious Apple Cider Whoopie Pies ready to be devoured! Enjoy every bite of these delightful treats that truly celebrate fall flavors!
Pro Tips for Making Apple Cider Whoopie Pies
These delicious treats are sure to impress, and with a few handy tips, you’ll be a whoopie pie pro in no time!
-
Reduce the Cider Thoroughly: Ensure that your apple cider is reduced to just 1/4 cup. This concentrates the flavor, giving your cookies that delightful apple cider doughnut taste.
-
Room Temperature Ingredients: Use room temperature butter and cream cheese for your frosting. This ensures a smoother, creamier texture that spreads easily without lumps.
-
Avoid Overmixing: When combining the wet and dry ingredients, mix until just combined. Overmixing can lead to tough cookies—nobody wants that!
-
Use a Cookie Scoop: For uniform cookies, use a cookie scoop to drop the dough onto the baking sheets. This ensures even baking and makes assembly easier.
-
Cool Completely Before Frosting: Allow your cookies to cool completely before adding the filling. This prevents the frosting from melting and turning into a gooey mess.
How to Serve Apple Cider Whoopie Pies
Serving Apple Cider Whoopie Pies can be as fun as making them! They’re perfect for gatherings or cozy nights in, and with a little creativity, you can make them even more special.
Garnishes
- Caramel Drizzle: A light drizzle of caramel sauce over the top adds extra sweetness and visual appeal.
- Chopped Nuts: Sprinkle some finely chopped pecans or walnuts on top for added crunch and flavor.
- Cinnamon Dusting: A light dusting of cinnamon sugar on top enhances the fall flavors beautifully.
Side Dishes
- Hot Apple Cider: Pair these whoopie pies with steaming cups of hot apple cider for a seasonal treat that warms the soul.
- Pumpkin Spice Latte: The spiced notes of this popular drink complement the flavors of apple cider perfectly.
- Vanilla Ice Cream: A scoop of vanilla ice cream alongside a whoopie pie creates a delightful contrast in temperatures and textures.
- Cheese Platter: Serve with a selection of cheeses like sharp cheddar or creamy brie. The savory notes balance out the sweetness of the whoopie pies beautifully.
Apple Cider Whoopie Pies are not just desserts; they’re an experience! Enjoy crafting these delightful treats and sharing them with family and friends this fall. Happy baking!
Make Ahead and Storage
These Apple Cider Whoopie Pies are perfect for meal prep, allowing you to enjoy their delightful flavors throughout the week. With a few simple storage tips, you can keep them fresh and ready to satisfy your sweet tooth.
Storing Leftovers
- Store leftover whoopie pies in an airtight container at room temperature for up to 3 days.
- If you want to extend their freshness, refrigerate them. They’ll last up to a week when chilled.
Freezing
- To freeze, wrap each whoopie pie individually in plastic wrap or foil and place them in a freezer-safe bag.
- They can be frozen for up to 2 months. Just make sure to label the bag with the date!
Reheating
- For the best texture, let frozen whoopie pies thaw in the refrigerator overnight.
- If you prefer them warm, microwave them for about 10-15 seconds before serving.
FAQs
Here are some common questions about Apple Cider Whoopie Pies that might help enhance your baking experience!
Can I use regular apple sauce instead of apple butter in my Apple Cider Whoopie Pies?
Yes! Regular apple sauce works perfectly as a substitute for apple butter, giving your whoopie pies that same delicious apple flavor.
How should I adjust the recipe if I want to make mini Apple Cider Whoopie Pies?
To make mini versions, simply reduce the size of the dough mounds to about 1 tablespoon each and adjust the baking time down to 8-10 minutes.
What is the best way to fill my Apple Cider Whoopie Pies?
Using a piping bag makes filling your whoopie pies easy and mess-free! You can also use a small spoon if you don’t have one on hand.
Are Apple Cider Whoopie Pies suitable for special diets?
Absolutely! This recipe avoids pork, alcohol, and animal-derived gelatin, making it a great option for various dietary preferences.
Final Thoughts
These Apple Cider Whoopie Pies are truly something special—soft cookies filled with delightful flavors that capture the essence of fall. I hope you enjoy making them as much as I do! Whether you’re sharing with friends or savoring them solo, these treats are bound to bring warmth and joy. Happy baking, and don’t forget to share your creations!
Apple Cider Whoopie Pies

If you’re in search of a delightful fall treat that captures the essence of the season, look no further than these Apple Cider Whoopie Pies. These scrumptious cookies are infused with rich apple cider and warm spices, reminiscent of your favorite autumn flavors. They’re not just desserts; they’re a comforting experience to share with family and friends. Easy to make and perfect for any occasion, these whoopie pies are sure to become a staple in your fall baking repertoire. With a choice between luscious fillings like brown sugar cream cheese icing or spiced buttercream, you can customize each bite to your liking. Enjoy cozy evenings with these sweet treats that fill your home with the aroma of cinnamon and apples!
- Prep Time: 20 minutes
- Cook Time: 25 minutes
- Total Time: 45 minutes
- Yield: Approximately 12 servings 1x
- Category: Dessert
- Method: Baking
- Cuisine: American
Ingredients
- 2 cups apple cider (reduced to 1/4 cup)
- ½ cup unsalted butter (room temperature, divided)
- 1 ¾ cups flour
- ½ teaspoon salt
- 1 teaspoon baking powder
- ¼ teaspoon baking soda
- 1 ½ teaspoon cinnamon
- ¼ teaspoon ginger
- ½ teaspoon nutmeg
- ½ cup granulated sugar
- ¼ cup plus 2 teaspoons brown sugar (light or dark, packed)
- ¼ cup apple butter or applesauce
- 2 eggs
- ¼ teaspoon vanilla
- 3 tablespoons butter (melted)
- ¼ cup sugar
- ½ teaspoon cinnamon
- ½ cup unsalted butter (room temperature)
- 1 ¼– 1 ½ cups powdered sugar (sifted)
- 2 tablespoons plus 2 teaspoons alternate caramel sauce
- 1 pinch salt
- 4 ½ ounces cream cheese (room temperature)
- 3 tablespoons butter (room temperature)
- 2 tablespoons brown sugar (light or dark)
- 2 cups powdered sugar (sifted)
- ½ teaspoon vanilla extract
Instructions
- Preheat oven to 350°F. Reduce apple cider in a saucepan until concentrated (about 1/4 cup). Cool.
- In a bowl, sift together flour, baking powder, baking soda, salt, and spices.
- Cream together butter and sugars until fluffy. Add eggs one at a time and vanilla.
- Mix in cooled apple cider and apple butter/applesauce. Gradually add dry ingredients until combined.
- Scoop dough onto lined baking sheets and bake for 11-13 minutes until springy.
- Cool on racks, then fill with your chosen frosting.
Nutrition
- Serving Size: 1 pie (45g)
- Calories: 160
- Sugar: 14g
- Sodium: 120mg
- Fat: 7g
- Saturated Fat: 4g
- Unsaturated Fat: 2g
- Trans Fat: 0g
- Carbohydrates: 22g
- Fiber: 1g
- Protein: 2g
- Cholesterol: 30mg